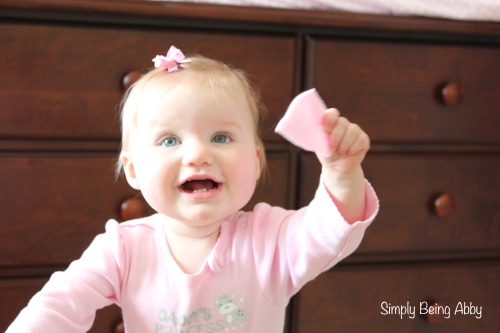
About a month ago, I went into my sweet little girl’s room after her nap, and this is what I found…
So proud of herself for learning how to stand up in her crib! All this mama could think was, Yikes! Yet another safety hazard!
One of my first concerns, besides that she could now fall and hit her head, was that I wondered how the crib would hold up to her constant need to bite EVERYTHING! I swear, my child is constantly teething. In all the baby research I did as we put together our baby registry, I had seen teething guards that you could buy and put on the edges of your crib. I didn’t want to spend the money on an expensive, store-bought guard so I wanted to try to come up with something I could make myself. I did some quick research on Pinterest and found the idea of using fleece for a teething guard. The specific post I found didn’t give very detailed directions, so I figured I would outline it here for you in some detail.
I went to Hobby Lobby and purchased a yard and a half of pink fleece to match Maddy’s room decor. You could use a color that matches the wood of your crib to camouflage the guard, but I figured, if I’m going to do it, might as well try to make it cute!
I washed the fleece and had it all set to go, however that’s as far as I got that week. Bryan and I have been busy working on the office and doing some work in the laundry room, and the fleece continued to sit in Maddy’s closet until I could find some time to work on it! Unfortunately, Maddy discovered how tasty her crib could be before I got the guard up!
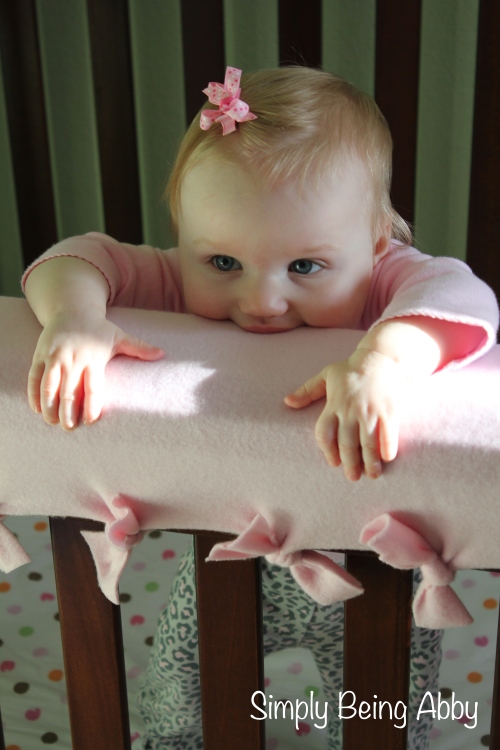
Oops!
Needless to say, I figured I better get going on this project. 🙂 If you would like to try to make one yourself, here’s how I created this easy, inexpensive, and adorable teething guard for Maddy’s crib:
1) Figure out how much fleece you need. As you can see in the picture above, our crib edges are fairly wide, so I needed more fleece than I would have thought at first glance. For the front, I ended up cutting the fleece to 50.5″ x 23″. For each of the sides, I cut the pieces to measure 26″ x 20″. Something I want to note, is that on the front rail, I chose to add a second layer of fleece underneath the top and side facing in towards the crib. The specific fleece I purchased was not super thick and I was concerned that if Maddy actually bit it and worked at it, she may get through the layer of fleece that was there. Adding this layer would be optional, but for me, it made sense as it doesn’t look any different and gives me some extra peace of mind.
2) Drape the fleece over the edge of your crib and line it up so it’s centered where you want it to be.
3) If you want, you can measure out the spaces in between each slat, however I found it easier to just go ahead and cut out the strips I needed while just leaving the fleece on the crib edge. There really isn’t a need for this to look that neat because you will end up tying the fleece pieces together.
Here’s my little helper girl!
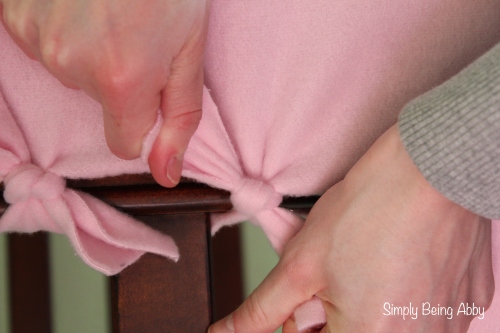
4) Tie a double knot in the fleece pieces, as shown below. I chose to keep the knotted part on the outside of the crib, as I didn’t want to create another temptation for our little sweetie to chew on!
That’s it!
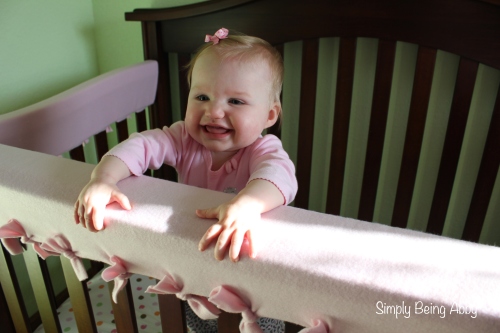
I so wish we would have done this the second Maddy learned to stand up in her crib! Here’s our happy babe testing out the finished product:
It works! (And no, I didn’t have to direct her to try it out for a picture…she went straight for it! :))
Inexpensive? Yep. Easy to make? Yep. Looks cute? Yep. Effective? Definitely!
xo,
Abby
Looking for more?


Great idea! I used old swaddling blankets as a really easy DIY crib rail guard solution (and referenced your instructions in my post) http://hintmama.com/2013/10/07/todays-hint-how-to-cheaply-save-cribs-from-little-teeth/
Woohoo! Totally doing this. Have you washed it? I’m wondering how big of a pain it’s going to be to take it off and put it back on to wash it. Of course…it may be one of those things I always mean to do but never get around to doing until the baby is out of the biting-the-crib-stage:):)
I actually haven’t washed it, because other than a test bite or two, Maddy really has left her crib alone! I don’t think it would be that difficult to wash and put back on the crib, but it would take some time. I am planning to take ours off soon, since I THINK we are out of the worst with teething 🙂 I sometimes use a lint roller to “dust” it off, but that’s about it! Have fun with your project!
Hi how much fleece did you actually buy? 1 yard? 2? Thanks! 🙂
Hi Courtney! I used a yard and a half of fleece. I definitely had some left over, but I usually prefer to have more than not enough!
This was exactly what I needed in a pinch. It also helped that I already had a fleece blanket (from IKEA) around to use. Thank you for posting your idea. The pictures were also very helpful.
I’m so glad this was helpful! That is such a good idea to use an Ikea blanket-those plain fleece ones are so inexpensive! Hope your crib stays nice and safe from those baby teeth 🙂
Hi! I am making teething crib rail covers and decided to look over a couple more tutorials before I cut… 🙂 I can’t tell because of the angle of the photo..did you cut the fleece at each edge of each rail? Cute pictures…love that she immediately tried to chew! 😉
Hi! I cut the fleece while it was draped over the crib edge. So I cut in between each slat up to where the crib was. Does that make sense? Let me know if that’s not what you meant 🙂
Thank you! Your directions were so helpful!! I used minky fleece and it looks so cute! I used swaddle blankets under the fleece for some added padding. I looked at several blogs on this and like your method best!! 🙂
Such a good idea to use swaddle blankets under the fleece! Hope yours is a successful bite-mark blocker 🙂
I just made mine today! Thank you so much for the pictures…as someone who isn’t crafty at all, the pictures made this really easy for me! One bit of additional information for people looking to make it: to determine how wide you need the fabric, measure around the crib rail and add 8 inches (effectively 4 inches on either side to make the double knot). Thank you again!!
I’m so glad my directions were helpful! 🙂
I’m about to do this project, and I have a question. Can you just double the fleece fabric and use that? Or take an extra piece of the fabric and tuck it under for extra padding?
I would just use an extra piece of fleece under it, for extra padding. That’s what I did. I think if you double it up, it will be too hard to tie! Hope this works as well for you as it did for me!
I love this and want to try making it this week! Why did you choose fleece? Would it work with polyester or cotton?
Hi! I chose fleece because it has more density to it, so it is probably a little more protective than just a regular fabric. It was also easy to work with, and just gave the look I was going for! 🙂
Love this idea! I was going to use regular fabric because I am afraid my little teether will tear up the fleece. Did you have that problem or does the fleece hold up with heavy biting?
Hi! Honestly, once we put the fleece up there it deterred her from biting it at all!
Great tutorial! Perfect for this non-crafty girl! Only cost $9 and took a few minutes. It looks great, too! No more laminate flakes when baby boy chews the crib rails…
Thank you for your tutorial!! It was exactly the solution I needed, and only cost $9 and a few minutes. Perfect for this no -crafty girl! And it looks super cute! No more chewing on the crib rails for our little guy!
So glad to hear this worked for you!
Thank you so much for your great ideas and I just made one for my grandniece, really appreciated