You are all very lucky that I decided not to drag out this post and go right ahead and show you the finished product! I may elaborate on certain aspects of the closet in blog posts to come, so keep an eye out for that.
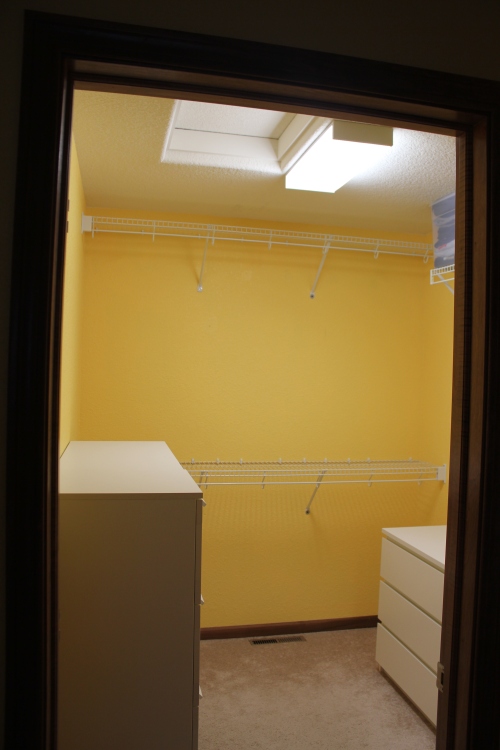
I mentioned in my previous post that our closet is not really all that big. I took a few pictures of the closet as we began to fill it to illustrate the actual size. I think it may help some of you see that you can still use what you have as a starting point!
This is it. Notice anything different yet? We painted! I had to convince Bryan that it would be worth our time, but I LOVE that we added some color to the walls. The paint we used was the same we used in our master bathroom. Another big difference? We removed the door to the closet to allow us more room for storage.
And now, the closet with some of the new furniture we picked out and the storage shelves and rods back in place.
And finally…the whole picture!
What do you think? We love the improvements we made and it’s made our life a little bit more efficient!
Details:
Hangers:
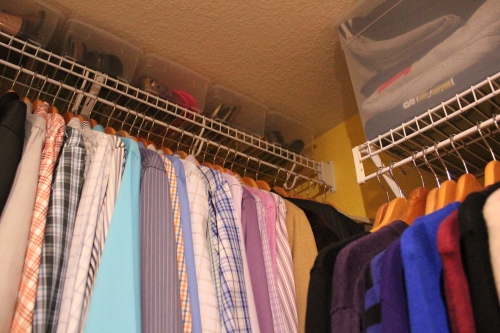
The hangers are from Target. I was super happy to find these wooden hangers at a reasonable price because while I really wanted wooden hangers, I didn’t want to spend a fortune on them. The 24 pack of hangers was $13.99. If you are patient and wait for them to go on sale, they would be an even better deal. So far, I love how they look and how they work. They hold everything from dress shirts, to dresses to sweaters and don’t leave any marks on any of the clothes. We purchased quite a few boxes of these as we used a hanger for each pair of pants, instead of using a pant hanger that holds multiple pairs of pants. We personally found these to allow quicker, neater access to jeans and dress pants.
Dressers:
Instead of using the plastic drawer containers, we measured and found some Ikea dressers that were reasonably priced and fit perfectly in the closet. I love how they look and I love that they fit all of our clothes, with even some room to spare!
The MALM 6-drawer dresser is available in smaller sizes and different colors, but this particular one can be found on Ikea’s site here.
We also purchased two BRIMNES dressers for the other wall in our closet. The 4-drawer dresser can be found here and the 4-drawer chest can be found here. These dressers only fit into our closet now because we removed the closet door. Without doing that we would have lost this wall of space.
Storage Containers:
The shoe boxes are from The Container Store ($33.80 for a case of 20 boxes). I had my shoes previously stored on an over-the-door rack and this is a much better solution. I can fit a couple of pairs of shoes in each box, if they are flats or sandals and flip-flops. I have my summer shoes currently stored higher since I don’t need to easily access them at the moment. Come summer I will rotate out my winter heels and flats and move the summer shoes down to eye level.
The boot boxes, also from The Container Store, were $9.99 each. They keep my boots free of dust and store them neatly. I can fit multiple pairs of smaller boots in each box if needed. I had previously just stored them on the floor and they were always getting dusty or falling over. These boxes were the perfect solution and I know I’ll use them for years to come!
These other clear containers are also from The Container Store. They are the deep sweater boxes and were $9.99 each. I really like that they are clear so we can see what is in them and when we adjusted our closet system, we made sure the heights would work so that they perfectly fit on top. I can easily reach them without a step stool. Bryan’s sweatshirts and golf shirts are in two of them, and my purses and clutches/wallets are in the other two.
Lighting:
We purchased the light fixture from Menards. It gives off much better light for our closet than what we had!
Photo/Poster:
The picture above the Brimnes dressers is also from Ikea.
So, before…
And, after…
This was a project that took some intense planning and organizing but has paid off in a really big way! I am very happy we were able to spend the time organizing our own space before Baby #2 comes along! 🙂
xo,
Abby
Looking for more?


One thought on “Master Closet: After”